TP3: HTML - le langage : menu et tableau, découverte de bootstrap


Exercice : Partie 1 Le menu

<nav class="navigation">
    <a href="http://cours-info.iut-bm.univ-fcomte.fr"  target="_blank"> cours-info </a>
    <a href="http://www.iut-bm.univ-fcomte.fr"  target="_blank"> l'iut </a>
    <a href="form_article.html"> ajouter un article </a>
    <a href="form_type_article.html"> ajouter un type d'article </a>
    <a href="https://developer.mozilla.org/fr/docs/Learn/HTML/Introduction_to_HTML/Document_and_website_structure" target="_blank"> exemple de structure d'une page </a>
    <img src="image_iut.jpeg" alt="image">
</nav>
    <link rel="stylesheet" media="screen" href="mes_styles.css" >
body {
    background-color: yellowgreen;
}

nav.navigation{
    width:100%;
    height: 70px;
    background-color : khaki;
}

a {
    width:150px;
    height: 30px;
    background-color:gold;
    border: 1px green groove;
    text-align:center;
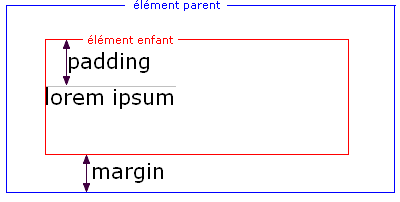
    padding: 10px;
    margin : 10px;
    border-radius: 15px 50px 30px 5px;
    display:block;
    float:left;
}

a:hover {
    background-color:pink;
}

Exercice : Partie 2 Le tableau

<br>
<table class="tableau2" id="tableau2">
    <caption>Recapitulatifs des produits</caption>

    <thead> <!-- En-tête du tableau -->
    <tr>
        <th>id</th>
        <th>type</th>
        <th>nom</th>
        <th>prix/kg</th>
        <th>ref</th>
        <th class="action">operations</th>
    </tr>
    </thead>

    <tbody>
    <!-- ce bloc sera dans un prochain tp remplacé par une requete SQL exécuté par un script python -->
    <tr>
        <td>1</td><td>fruit</td><td>banane</td><td>2.00</td><td>131059</td><td class="action"><a href="list_produits.html?id=1">Modifier</a></td>
    </tr>
    <tr>
        <td>2</td><td>fru</td><td>poire</td><td>2.50</td><td>196435</td><td class="action"><a href="list_produits.html?id=2">Modifier</a></td>
    </tr>
    </tr>
    </tbody>

    <tfoot> <!-- Pied de tableau -->
    <tr>
        <th>id</th>
        <th>type</th>
        <th>nom</th>
        <th>prix/kg</th>
        <th>ref</th>
        <th class="action">operations</th>
    </tr>
    </tfoot>
</table>
table.tableau2{
    width:40%;
    border:solid  5px;
    border-color: blue;
    border-collapse:collapse;
    text-align:center;
    margin-left:auto;
    margin-right:auto;
}

table.tableau2 td {
    border:solid green 2px;
}

table.tableau2 caption{
    margin-left:auto;
    margin-right:auto;
    margin-bottom:5px;
    color:olive;
}

table.tableau2 thead{
    color:purple;
    background-color:LightBlue; /*#ADD8E6*/
}

table.tableau2 thead th{
    border:solid red 2px;
}

table.tableau2 tfoot{
    color:purple;
    background-color:green;
}


Tester le menu et l’affichage du tableau

Remarque : “tr” signifie “table row”, “td” signifie “table data”, “th” signifie “table header”

FrameWork CSS : Bootstrap

Présentation d’un framework CSS puis de BOOTSTRAP

intégration dans une page HTML

éviter d’utiliser un CDN (les fichiers sont recharger à chaque chargement de page)

<link href="bootstrap/css/bootstrap.css" rel="stylesheet">
<script src="bootstrap/css/bootstrap.js"></script>

intégration dans une page HTML

Système de classe

<p class="text-danger text-center">classes utilisées : .text-danger .text-center</p>
<p class="text-warning bg-dark text-center">classes utilisées : .text-warning .bg-dark .text-center</p>
exemple d’utilisation de classes bootstrap


Système de grille : documentation - exemple 1 (codepen) - exemple 2 (codepen)


Pour aller plus loin avec tailwind tuto 1

Utilisation de boostrap


vérifier que dans le dossier du fichier html

<!DOCTYPE html>
<html>
<head>
    <meta charset=utf-8 >
    <title>TP5 programmation Web</title>
    <link rel="icon" type="image/x-icon" href="iconeweb.ico" >
    <link href="bootstrap/css/bootstrap.css" rel="stylesheet">
    </head>
<body>

    <script src="bootstrap/js/bootstrap.js"></script>
</body>
</html>

recopier après la balise body


Il faut créer un container


ajouter dans ce container


ajouter un lien sur un fichier de style

    <link rel="stylesheet" href="mes_style.css" type="text/css" media="screen">

créer un fichier mes_style.css recopier les styles du tp dans ce fichier et utiliser les styles précédents


(voir exemple joint dans le fichier ressource)

Exercice 2 ( à terminer en devoirs à la maison, si ce TP n’est pas fini en TP )

Voici 2 tableaux (listes) avec à l’intérieur des dictionnaires. Ces listes peuvent s’apparenter à des tableaux à 2 dimensions. C’est le résultat de 2 requêtes SQL.


types_articles = [
    {'id': 1, 'libelle': 'Fourniture de bureau'},
    {'id': 2, 'libelle': 'Mobilier'},
    {'id': 3, 'libelle': 'Mobilier Jardin'},
    {'id': 4, 'libelle': 'Arrosage'},
    {'id': 5, 'libelle': 'Outils'},
    {'id': 6, 'libelle': 'Divers'}
]


articles = [
    {'id': 1, 'nom': 'Enveloppes (50p)', 'type_article_id': 1, 'prix': 2, 'stock': 1, 'description': None, 'image': None},
    {'id': 2, 'nom': 'Stylo noir', 'type_article_id': 1, 'prix': 1, 'stock': 10, 'description': None, 'image': 'stylo.jpeg'},
    {'id': 3, 'nom': 'Boite de rangement', 'type_article_id': 1, 'prix': 3, 'stock': 7, 'description': None, 'image': 'boites.jpeg'},
    {'id': 4, 'nom': 'Chaise', 'type_article_id': 2, 'prix': 40, 'stock': 2, 'description': None, 'image': 'chaise.jpeg'},
    {'id': 5, 'nom': 'Tables', 'type_article_id': 2, 'prix': 200, 'stock': 3, 'description': None, 'image': 'table.jpeg'},
    {'id': 6, 'nom': 'Salon de Jardin alu', 'type_article_id': 3, 'prix': 149, 'stock': 3, 'description': None, 'image': 'salonJardin2.jpg'},
    {'id': 7, 'nom': 'Table+6 fauteuilles de Jardin', 'type_article_id': 3, 'prix': 790, 'stock': 3, 'description': None, 'image': 'tableFauteuilsJardin1.jpg'},
    {'id': 8, 'nom': 'Set Table + 4 bancs', 'type_article_id': 3, 'prix': 229, 'stock': 2, 'description': None, 'image': 'setTableChaises.jpg'},
    {'id': 9, 'nom': 'arrosoir bleu', 'type_article_id': 4, 'prix': 14, 'stock': 2, 'description': None, 'image': 'arrosoir1.jpg'},
    {'id': 10, 'nom': 'arrosoir griotte', 'type_article_id': 4, 'prix': 10, 'stock': 2, 'description': None, 'image': 'arrosoir2.jpg'}, 
    {'id': 11, 'nom': 'tuyau arrosage', 'type_article_id': 4, 'prix': 32, 'stock': 3, 'description': None, 'image': 'tuyauArrosage1.jpg'}, 
    {'id': 12, 'nom': 'tournevis', 'type_article_id': 5, 'prix': 24, 'stock': 3, 'description': None, 'image': 'lotTourneVis.jpg'},
    {'id': 13, 'nom': 'marteau menuisier', 'type_article_id': 5, 'prix': 8, 'stock': 3, 'description': None, 'image': 'marteau.jpg'},
    {'id': 14, 'nom': 'pince multiprise', 'type_article_id': 5, 'prix': 22, 'stock': 3, 'description': None, 'image': 'pinceMultiprise.jpg'}, 
    {'id': 15, 'nom': 'perceuse', 'type_article_id': 5, 'prix': 150, 'stock': 3, 'description': None, 'image': 'perceuse.jpg'}    
]

Créer 2 fichiers list_type_article.html et list_article.html


Réaliser ces 2 tableaux dans les fichiers HTML list_type_article.html et list_article.html

Remarque : Pour les valeurs à None, ne rien mettre dans les cellules (colonnes) du tableau HTML


Réaliser un menu pour afficher les 2 formulaires (tp précédent) et les 2 tableaux (avec 4 liens)


Valider votre page sur le site http://validator.w3.org/


Soumettre les 2 formulaires et vérifier que les informations saisies sont dans l’URL